Friday, February 24, 2012

Classroom Management Systems!

This week I wanted to share pictures of some of the the classroom management systems that I have seen in several of the schools!  We all have LEARNING CENTERS in our classrooms, yet sometimes they can get overcrowded, disorderly and cluttered.  Here are just a few great reasons why setting up a system to manage your center time is beneficial!

  • As we discussed in our Conscious Discipline Training, the design and set up of your classroom INFLUENCES BEHAVIOR!!
  • Children have an opportunity to MAKE CHOICES thus becoming more INDEPENDENT
  • They will learn to be RESPONSIBLE
  • Children will interact COOPERATIVELY and enhance their social skills


 So here are some systems that I wanted to share with you right from some of our PINE VILLAGE TEACHERS to inspire you to try one, or come up with one on your own!

NECKLACES - I have seen the "Necklace System" in at least three of the schools  (JP with Janette and Elba, Kendall Square with Denise and Alejandra and Newton with Kelly) and wanted to share some pictures of how it works.  The key to this system  (and to ALL of the systems) is to have CLEARLY LABELED Learning Centers with CLEARLY LABELED materials.

1.)  Take a photograph of the actual center in your classroom and print out copies.
2.)  If you want to limit the center to 4 children, then put 4 necklaces.  If you want to limit the center to 2 children then put 2 necklaces.
3.)  Children go to the main board to pick their necklace then go to the center of their choice.  When they are finished, then they return the necklace to the board and pick a new necklace.


KEY CHAINS and HOOKS - Here is another great system that is in Marcela's class in JP!

1.)  These hooks are placed on her front door with each child's name.  Every child has a different colored key chain on the hook.  


2.)  The various centers have hooks on it to limit the number of children.  This area has two hooks so two children can play in there.


3.)  As with all of the systems, the children move their colored keychain with them as they make choices in the room.


PHOTOS ON VELCRO CARDS -  Teresa and Fiorella in JP have a system using the photographs of the children that is another great way of organizing your centers.  


1.)  The children's photographs are available to them in a plastic bin.  

2.)  They can choose which area they would like to explore based on the number of velcro spots available on the sign.  

3.)  When they are finished with one area, they take their picture with them to go explore a new center!

NAME CARDS IN A POCKET CHART- Here's another unique way to organize the centers each day that Pamela in Porter Square uses!  


1.)  Take pictures of each center and put the number of dots to correspond to the number of children that can go in each center.


2.)  The children move their name cards to the center they will be going to.  They return to the main Center Board to move their name as they move throughout the room!


So these are just a SAMPLE of the many great ideas of classroom management systems that are going on in our great Pine Village Schools!  You are all so amazing!!  GRACIAS!

Jacie


Friday, February 17, 2012

   CIRCLE TIME IDEAS!!

   
Elements of a Successful Circle Time  
There are just five things to keep in mind when planning circle time:  
  1. Prepare for a consistent transition into and out of circle time. Repetition of a simple song, movement, action, guessing game, activity, or icebreaker to signal the start and end of circle time helps children learn the basics with greater ease. Tape a circle on the floor, create a circle of carpet squares to sit on, or place names around the circle so each child knows where to go. 
  2. Length of time and group size should be appropriate: Toddlers should only have five to 10 minutes of circle time; preschoolers can participate for 10 to 15 minutes. For best results, the group size should not exceed 20 children.    
  3. Use a variety of techniques to hang on to children’s attention. These techniques include humor, suspense, varying the tone and volume of your voice as you read and speak, including children in the story or an activity as much as possible, and choosing topics that are of interest to young children. 
  4. Choose a wide variety of topics, themes, books, songs, activities, games, experiments, movement, fingerplays, and props that are appropriate for the children’s age and stage of development. Over the course of a week or month, plan to touch on each area of development so children have the opportunity to learn new skills, practice developing skills, and learn more about the world they live in.
  5. Be prepared with a back-up plan. If a story, song, or activity is not of interest to the children, have another in mind to save the day. 
Thank you to our BRIGHTON SCHOOL for all of the wonderful circle times that I observed this week! 

Using Props:

Pointer props!  Here Alicia uses "Senor Palo" as a pointing stick, while involving the children.
   
Here's another idea that Maru uses: "El Dedito" (I saw Diadys use this in the South End too!)


Involving the kids! An excellent way for the kids to practice writing is by having the children take turns writing the number on the calender with dry erase markers!


Puppets!!!  "Titeres" are a great way to do role play, storytelling, and bringing songs to life with the children


Using Dolls are another great prop for circle time...oh wait a minute...that's a real baby! Had to put  a smiling Acadia in there who helped with circle time a minute! :-)

Using a microphone to get the children's attention!  Here is Patricia using a karaoke machine!  The kids also get to sing in the mic too!


Felt Board Songs and Stories!  Using visual aids can help catch the attention of these budding bilinguals!  Here's a short video clip of Pati in action!


Using funny glasses as an attention getter!  I think almost every school has seen my collection of novelty glasses!  You can try it too!


 Pom Poms to move and dance with!  These were purchased at the Dollar Tree. 


Costumes!!  Dressing Up in various costumes to bring the story alive will always catch the children's attention!  Here is Alicia as a "murcielago" while reading a Bat book. 


Instruments!!  Alicia taught herself to play a few chords on this little guitar to sing her "Es Hora del Circulo" song! 


Patricia played the DRUMS teaching the children rhythm!


I look forward to continuing to visit the schools and seeing more circle time ideas to share!! 

Tuesday, February 14, 2012

Felt Boards in the Classroom


FELT BOARDS IN THE CLASSROOM:

A flannel or felt board is an important part of any early childhood classroom. One of the biggest benefits of having and using a flannel board is the opportunities it creates for oral language development.  At the felt board students can re-tell nursery rhymes, fairy tales and other popular stories or songs IN SPANISH too! Flannel boards come in a variety of shapes and sizes and the ideas for using them are endless!

Here are a few ways to make your own felt boards if you don't have one already!!

PIZZA BOX FLANNEL BOARDS


The pizza box flannel board is a great way to create individual felt boards, while storing the pieces easily. Now students can select a box and sit down on the carpet to re-tell their favorite stories. The re-telling center will become so popular now than ever before because you can offer more choices to the students. Creating your own individual pizza box flannel boards is super simple! I have included the materials you will need below.
  • Flannel/felt from craft store or from the recycling center (FREE)
  • Hot Glue Gun
  • Scissors
  • Pizza Boxes- ask your local pizza parlor for unused boxes, most are happy to donate for FREE
  • Optional: Computer labels
Directions:  Cut your felt to fit the front of the pizza box and use the glue gun to adhere the flannel to the front of the box. Flannel stories can be stored inside the box. The name of each story or song can be typed on a computer label and attached to the side of the boxes. Store several boxes on a shelf and allow students to choose their favorites.
CANVAS FELT BOARDS
Go to a craft store like Michaels or AC Moore and purchase some inexpensive canvas boards.  Use a staple gun to staple the felt to the board and voila!  You have yourself a felt board! 


Not only can you make a big one for use at circle time, but you can make several SMALL boards for the kids to use at the table to re-tell stories and songs. 
--------------------------------------------------------------------------------------------------------------------------------------------
Now that you've made your own felt board...now what??

Here's a creative idea that can be used with ANY AGE!! 

Create a  "STICKY BOARD" to count straws!
1.) Tape Contact Paper to your Felt Board with the Sticky Side OUT.
2.) Have kids select some straws and add them to the Sticky Board during Circle time.
3.) Once straws are all added to the board, count them together as a group!
4.)  Leave the board out during Center Time with colorful straws.  Put straight ones and the bendy kind, long and short ones to create various designs.  Super FUN!


Or....

Use the felt board as a nice soft surface for the kids to do sorting with buttons or use other small items.  Notice the creative use of the egg carton!


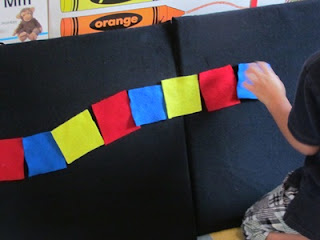
Making patterns....


Telling stories...


Math Activities


How about Tic Tac Toe?

Have the kids help add the pieces to the felt board as an interactive way of story telling!


Remember:  You don't HAVE to be an artist to draw your own felt pieces!  You can easily print out images from Google Images so you can laminate and add VELCRO to the back to create your pieces. 


You've made all of the pieces, now where do you store them??

Here's a great way to store all of those pieces!
Get a couple of 3 ring Binders....


Put the pieces in some Gallon sized ziploc bags... Be sure to punch holes in the bag

Or store smaller pieces in sandwich sized bags and place in page protectors...
You can even close the top of the page protectors with a piece of velcro on the top.

Be creative and have fun creating your collection!!

Jacie


Jacie Feinberg, Education Director
Pine Village Preschool

214 Lincoln Street Suite 112
Allston, MA 02135
www.MyBilingualPreschool.com
781-710-2348 (cell)

Sensory Tables Ideas, Craft Recipes and Bulletin Board Contest!!


Sensory Table Ideas
A picture tells a thousand words, so I will let these photos be inspiration to you to change your sensory table at least once a week!! It will sure to be one of the most popular centers in your classroom!!   
I am attaching even MORE ideas as an attachment to this email.  Print it out and keep it taped to the top of your sensory table for hands on inspiration!!

(*Thank you PVP Needham for all the pics from last year!!)
Cutting "hair" with scissors.


Recycled materials in purple sand


Flour and water messy fun


Bugs, funnels, cups and spoons in rice


Planteating dinosaurs, veggies and water (one time use!)  :-)


Paleantologists looking for dinosaurs in rocks - toothbrushes and craft sticks, and dinosaur out of eggs (see recipe below)

Animals, cups and craft sticks in purple sand

FLOUR FUN


Animals in Rice

WATER SCIENTISTS - funnels, cups, bowls, colored water, turkey basters, "scientific gloves", variety of containers to move water to


Bathing Station - paintbrushes, babies, soap and water


Colored PASTA

Variety of beans and cups


JELLO "BRAINS" - cups and tweezers

Good old fashioned water and duckies and boats

Good old fashioned sand and trucks

Sensory Table OUTSIDE


Salt and Coffee

Hide foam letters in dry pasta

"Rough Pinecones" and "Soft Cotton Balls" for exploring and sorting


Chocolate Pudding!


"Sensory Table" at the Table with Recipe Cards


A CLEAN KID IS A BORED KID!!!http://cdn-cf.aol.com/se/smi/2b00003233/04


Some Craft Recipes to inspire you!!


Homemade Stickers
2 T glue         1 T vinegar

Mix together and paint on back of picture.  Let dry.  Re-moisten to activate sticker.

Cotton Dough
1 c. flour        3/4 to 1 c. water         1 bag small cotton balls

Mix flour and water to smooth paste.  Handling gnetly, coat cotton balls in flour paste.  Allow excess moisture to fall off each ball.  Form ball insido desired shapes.  Bake at 325* for 1 hour on cookie sheet. 

Mixing Rainbow Paint
4 c. water         1 c. cornstarch         1/2 c sugar

Cook all ingredients until mixture thickens and is clear.  Divide mixture into 3 parts, color one part red, one part yellow and one part blue.  Put two colors in zip lock bag.  When squeezed a different color will appear.

Frozen Paint

Pour tempera paint into large ice cube trays.  Place in freezer.  After 50 minutes, stick Popsicle stick in heach cube and return to freezer.  Pop out of tray and use on finger paint paper. 

Mystery Paint
4 tbs. baking soda      4 tbs. water         cotton swabs        water colors        white paper

Dissolve baking soda in water.  Dip cotton swab in mixture and paint an invisible picture.  Let dry.  Brush water colors over paper to reveal the mystery picture. 

Dino Eggs
2 1/2c flour        2 1/2 cups used coffee grounds    1 1/2 c salt     1 cup sand     1 cup water      plastic dinosaurs

Mix flour, coffee grounds, salt and sand.  Gradually stir in water until mixture holds together.  Use as little water as possible to speed up drying.  Add plastic dinosaurs as you are forming the rock.  Let air dry.  Looks like  a rock. Breaks open easily for baby dinosaurs. 

Alternative Dino Eggs Recipe
5 cups of sand             1 cup of Plaster of Paris        1 cup of water        Dinosaur toys

Ahead of time, mix ingredients until you have the consistency of mud.  Create dino eggs around the dinosaur toys and allow to dry over night.  Go on a dinosaur hunt outside…maybe give older children maps to follow as if they were paleontologists.  Give children toothbrushes and popsicle sticks to scrape away at the eggs to find the “fossils” inside.

REMEMBER!  The Bulletin Board Contest has started this month!! 
Winners of $25 Visa Gift Cards (plus a chance to win $250!!!) will be based on:
  • Creativity (borders, background. use of Spanish)
  • Clever Title
  • Aesthetic Appeal
  • Organization
The theme of the bulletin boards can be anything you like!  You can use the open-ended art of the children,  photos of the children, parent communication, pictures of all the staff or anything else you choose!  If you work with a co-teacher, it's up to you to decide if you'd like to team up (to share the prize) or make your own separate displays.

 All photos of your bulletin boards are due by Friday, February 17th.   


Gracias!

Jacie